

Featured WAG: Behind the Brand with TV Show Host Jackie Long, Jack Of All Tastes

Vegetarian Butternut Squash Chili
Why I'm Going Vegan

How I Help My Man Conquer Contract Year
Dairy-free, Egg-free Strawberry Cupcakes

3 Quick and Easy Breakfast Recipes

Easy Baked Ziti
Scrambled Tofu
Breakfast Fridays! On the menu: Dairy-free, Egg-free Banana French Toast

At our house, we have a tradition we like to call "“Breakfast Fridays.” That’s where we have breakfast food for dinner and my darling son gets to stay up late with daddy watching TV and eating snacks until they both fall asleep on the couch. LOL. He looks forward to this bonding time with his dad every week. And it gives mommy some much needed “me time” on a Friday night to catch up on my Netflix, blog, or finish reading that novel on my nightstand that I keep telling myself I’m going to finish.
Well, this past Friday we had Dairy-free/ Egg-free Banana French toast. Wait? You can make French toast without eggs? Yes!!!! You can! And I’m gonna show you how.
Dairy-free/Egg-free Banana French Toast-makes about 4 slices
Ingredients:
- “safe” bread (I just used 4 slices of a "safe" whole wheat sandwich bread)
- ¼ cup of banana puree ( I mashed mine with a fork, but you can totally use a blender)
- ¼ cup non-dairy milk (we use Almond milk in our house)
- 2 tbsp. sugar
- 1 tbsp. vanilla extract
- 1 tsp. cinnamon
Mix together the banana puree, non-dairy milk, sugar, vanilla and cinnamon in a dish flat and wide enough for dipping the bread. Coat each side of a piece of bread by dipping into the mixture. Now, be careful with this process. Dip one side, then flip the bread immediately to dip the other side. Don’t allow the bread to sit in the mixture. If you do, it will be a soggy mess and just won’t cook up right. Next, brown each side of the bread slices in a medium-high skillet. About 3 minutes per side. Flip them over a few times while they're browning to prevent burning on either side.


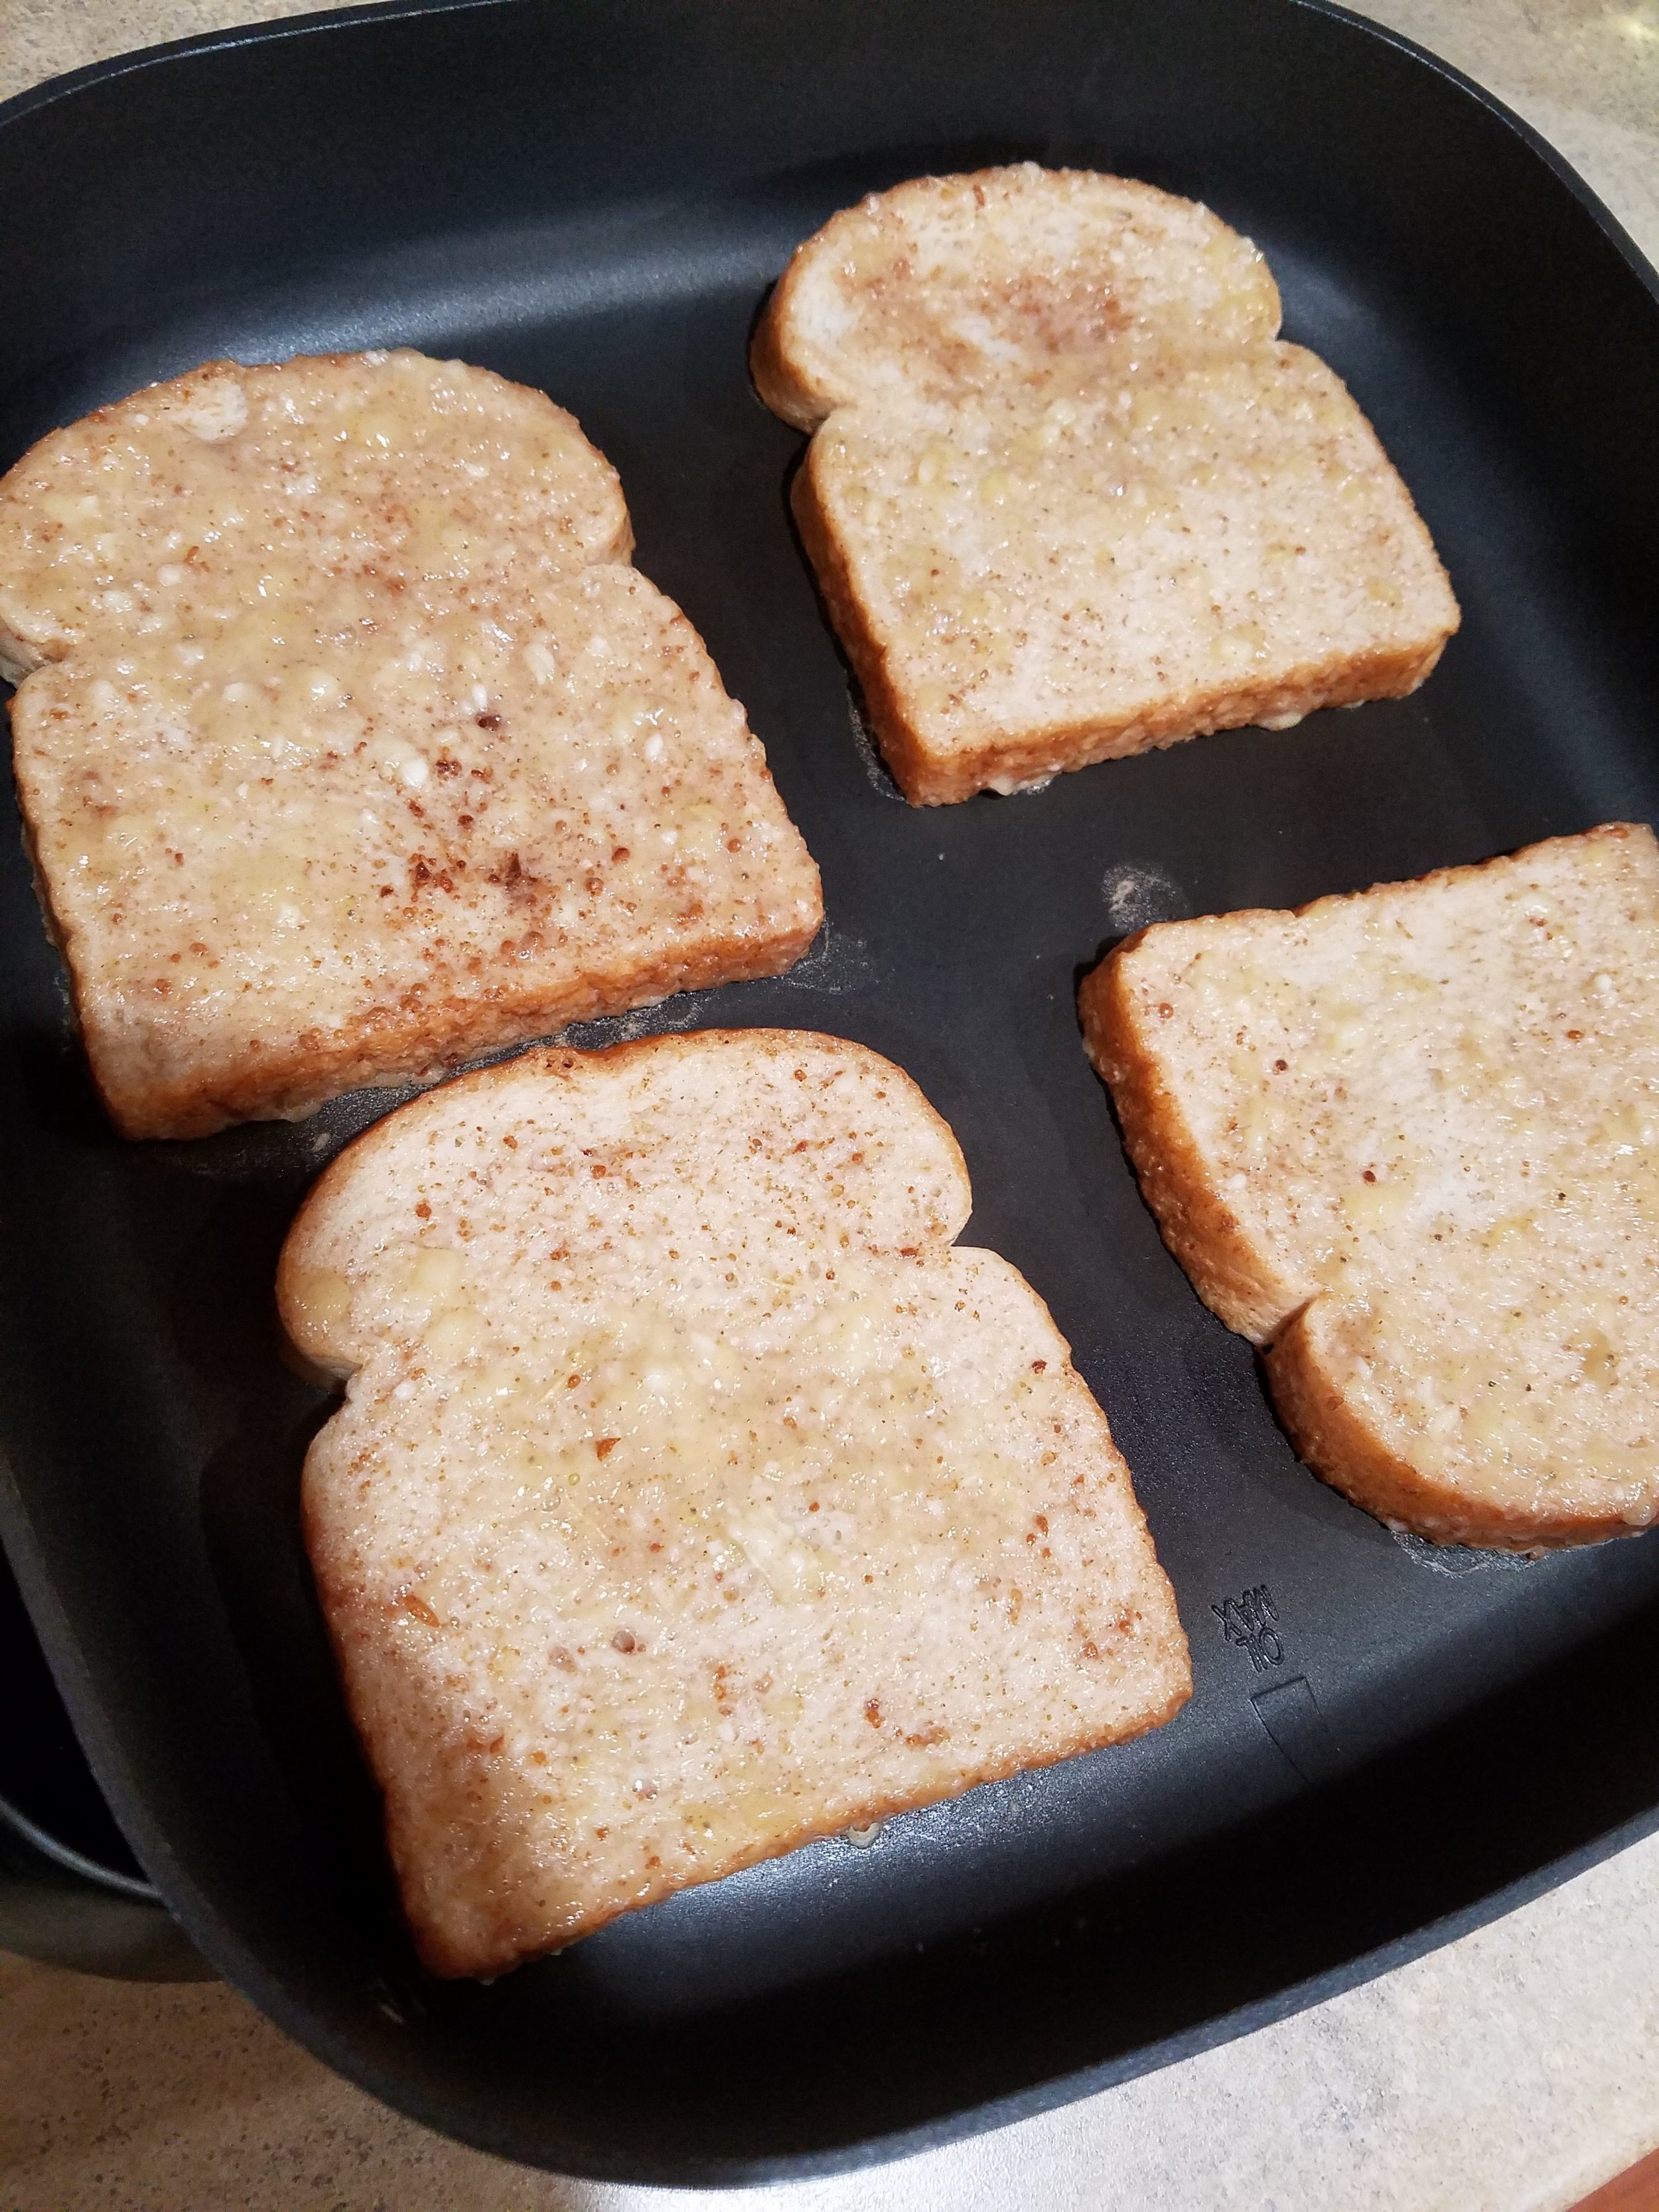
Next transfer the slices to a 400 degree oven to finish cooking. Bake about 10 mins., flipping halfway through.
I topped ours with some powdered sugar, sliced strawberries and bananas, and warm maple syrup.
Enjoy!

Oatmeal Double Chocolate Chip Cookies

I’m glad football season is back for a ton of reasons, but one of the Top 3 is that I now have someone to give these baked goods to! My baking slows down severely in the offseason because I can’t afford to have piles of cookies, bars, and cakes all over my kitchen. There are now a bunch of hungry offensive lineman eager to help me out with all the extra treats.
This is a recipe that I am constantly tweaking. It can take adjustments and additions so I love to play around with it. This combo is my favorite right now!
Ingredients
1/2 cup rolled oats, chopped
2-1/4 cups all-purpose flour
2 tsp. baking soda
1 tsp. salt
1/4 tsp. cinnamon
8 oz. cup unsalted butter (2 sticks), softened
3/4 cup brown sugar
3/4 cup granulated sugar
1-1/2 tsp. vanilla
1/2 tsp. lemon juice
2 eggs
3 cups miniature chocolate chips
1-1/2 cups finely chopped walnuts (optional)
Instructions
- Prepare oats and walnuts. Use a blender/or food processor to pulse the rolled oats till they are roughly chopped. This gives you a chewier cookie.
- Cream together butter, sugar, vanilla extract, and lemon juice. Mix in the eggs one at a time, until combined.
- In a separate bowl, combine dry ingredients (flour, baking soda, salt, and cinnamon). Stir into wet ingredients till dough forms. Gently fold in the oats, walnuts, chocolate chips.
- Chill the dough overnight. BE PATIENT!*
- Bake cookies at 325 degrees for 15-18 minutes. You are looking for barely brown edges and cracked tops.
- Let cool, Enjoy!
- *It’s easiest to scoop the dough onto plates covered with wax paper before you refrigerate the dough. Scooping cold dough is not fun.
TIPS
Get creative with your add-ins! Try coconut flakes, pecans, dried cranberries, or butterscotch chips.
Dairy-free, Egg-free Chocolate Cupcakes w/ Cookies & Cream Frosting

Chocolate should be a food group, don’t you think? I mean c’mon! Everything’s better with chocolate on it! Okay, maybe not everything…but you’ve got to admit, a little chocolate does make things better. At least for me it does. I’m a bit of what some would call a choco-holic. I admit…it’s a problem. I love chocolate cake. And I love chocolate cookies. Seriously, I go through a package of Oreos in a few days! It’s my guilty pleasure. At night I look forward to my crunchy, sweet 10 o’clock snack while hubby and I catch up on Netflix.
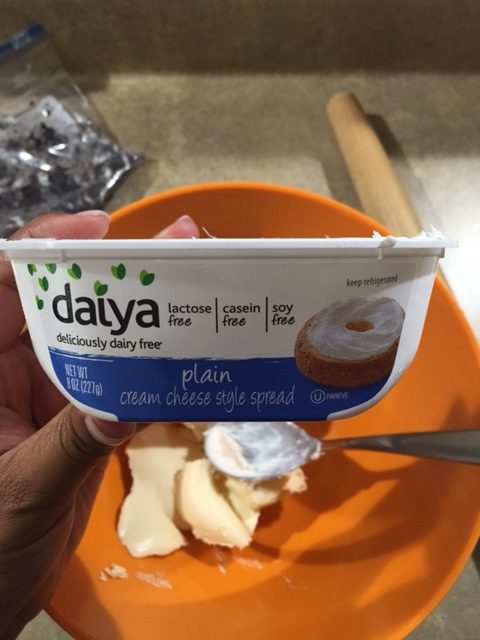
This recipe is the perfect marriage of chocolate cake and chocolate cookie. The chocolate cake is just a boxed cake mix, but, it's allergy-friendly. And the cookies are Oreos. Which by the way are milk and egg-free! Score! And don’t fret…I realize I’ve got to balance out all that chocolate going on. So, I do this with a dairy-free cream cheese frosting which adds just a hint of tang. BTW, I really have to give props to Daiya for their cream "cheese"; it's allergy-friendly and actually tastes great.
Try this recipe! These little gems are seriously good and you'll love them, whether you're a fellow choco-holic or not.
Dairy-free,Egg-free Chocolate Cupcakes w/ Cookies & Cream Frosting-makes about 15 cupcakes
Ingredients:
Chocolate Cake Batter:
- 1 box “allergy-friendly” Chocolate Cake Mix ( we use Cherrybrook Kitchen)
Cookies & Cream Frosting:
- 6oz. dairy-free “cream cheese”
- ½ cup vegan butter
- 3 cups of confectioner’s sugar
- ½ cup crushed Oreo cookies


Prepare cake mix according to package. I use Cherrybrook Kitchen cake mixes because they’re allergy friendly, and don’t contain milk or egg. Pour batter into lined cupcake pan and bake according to instructions. Let cool.
To make the frosting, simply beat the vegan butter and dairy-free cream cheese together. Add in sugar 1 cup at a time, and continue to beat until fully incorporated. Gently fold in crushed Oreos.
Top each cupcake with a generous amount of frosting and finish it off with a cookie. Enjoy!
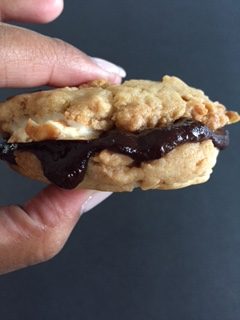
Dairy-free, Egg-free S'mores Sandwich Cookies

Do you love S’mores? I do. No, correction…I LOVE S’mores! It’s that fluffy marshmallow melted onto that crunchy sweet graham cracker with just a hint of saltiness, all smothered in smooth, rich melted chocolate! OMG…all that ooey-gooey deliciousness, that’s what I love!
In fact, I love it so much that I have multiple S’mores recipes. And today, I want to share with you one of my favorites: S’mores Sandwich Cookies. This yummy recipe is quick, easy, and best of all, it’s dairy and egg-free, which is a must in our house due to food allergies. Now don’t panic! Just because there’s no dairy or eggs, doesn’t mean there’s no flavor. These cookies are fantastic! Trust me, you won’t be disappointed!
Dairy-free, Egg-free S’mores Sandwich Cookies-makes about 18 cookies, depending on size
Ingredients:
Cookie Dough:
2 ¼ cups of flour
1 cup crushed graham crackers
1 tsp. baking soda
Dash of salt
½ cup brown sugar
½ cup white sugar
1 tbsp. vanilla
1 cup vegan butter
¼ cup non-dairy milk
1 cup of miniature marshmallows (I chopped mine to make them even smaller)
Chocolate Filling:
1 cup dairy-free chocolate chips
1 tbsp. non-dairy milk
Let's get started!

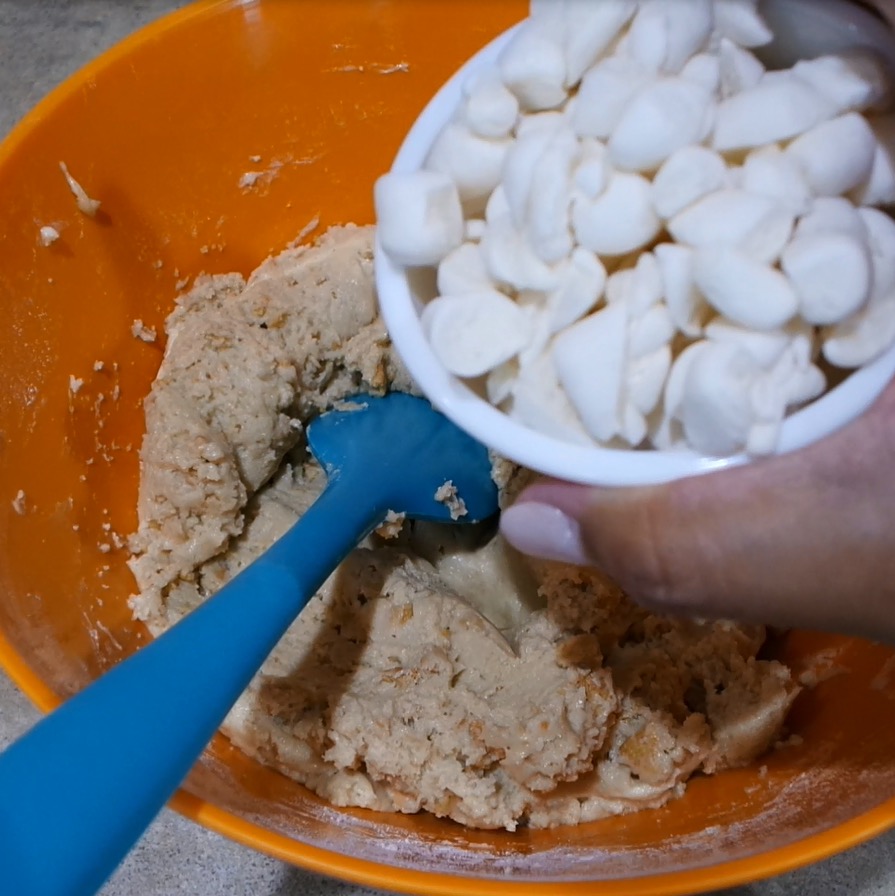
Mix dry ingredients (first 4) together in a bowl. In a separate bowl mix wet ingredients (remaining 5), except for marshmallow. Add dry ingredients, a little at a time, to bowl of wet ingredients. Mix together. Gently fold in marshmallow. Scoop cookie dough onto parchment paper lined baking sheet (may use a small ice cream scooper for small size). Flatten slightly. Bake at 350 degrees, for 15-18 mins. until golden brown. Let cool.


To make the chocolate filling, mix together chocolate chips with non-dairy milk and microwave on high for 20 seconds to melt. To make the sandwiches, flip one cookie over so the bottom side is up. Spread on some of the chocolate filling and top with another cookie to form a “sandwich”. Enjoy!
How to choose the RIGHT snack bar

With the world embracing on-the-go methods of fueling, the production of snack bars has skyrocketed! If you go into your local grocery store, you will find that there is a whole aisle dedicated to them! We all love variety right? The only problem is with so much variety you could spend 15 minutes in the snack bar aisle deciding between a mint chocolate or peanut butter crunch just to leave with the blueberry one. Even with that many options, you may not even need that particular bar nutritionally. Yep, I have been there too. So how can you find not only the healthiest bars but also the one perfect for you? By asking yourself this short list of questions; you should be in and out of the grocery store in record time with a purchase you won't regret later! Can you read everything on the ingredients label?

Since some snack bars are filled with junk like fillers, bulking agents and preservatives that neither you nor I can pronounce, your best bet is to go with the bars that contain a list of ingredients that you are familiar with. An added benefit is if you can count those ingredients on one hand! The less the better in most cases.
Where does the sugar come from?
When you look at the nutritional label, you can usually find "sugar" listed under "Total Carbohydrates." Its important to note that not all sugar is created equal, natural sugars found in milk and fruit are very different and more beneficial than added sugars like chocolate, High Fructose Corn syrup, sucralose and molasses. You may get lucky and find a label that will differentiate between the two by listing "added sugar," to make it easy on you as a consumer. However, if its showing you that it has added sugars then you should probably look for a different option. Alternatively, choose snack bars that use fruits as their base sweeteners, this can not only curb your sweet tooth but can also provide a serving of fruit!
What do you need it for?
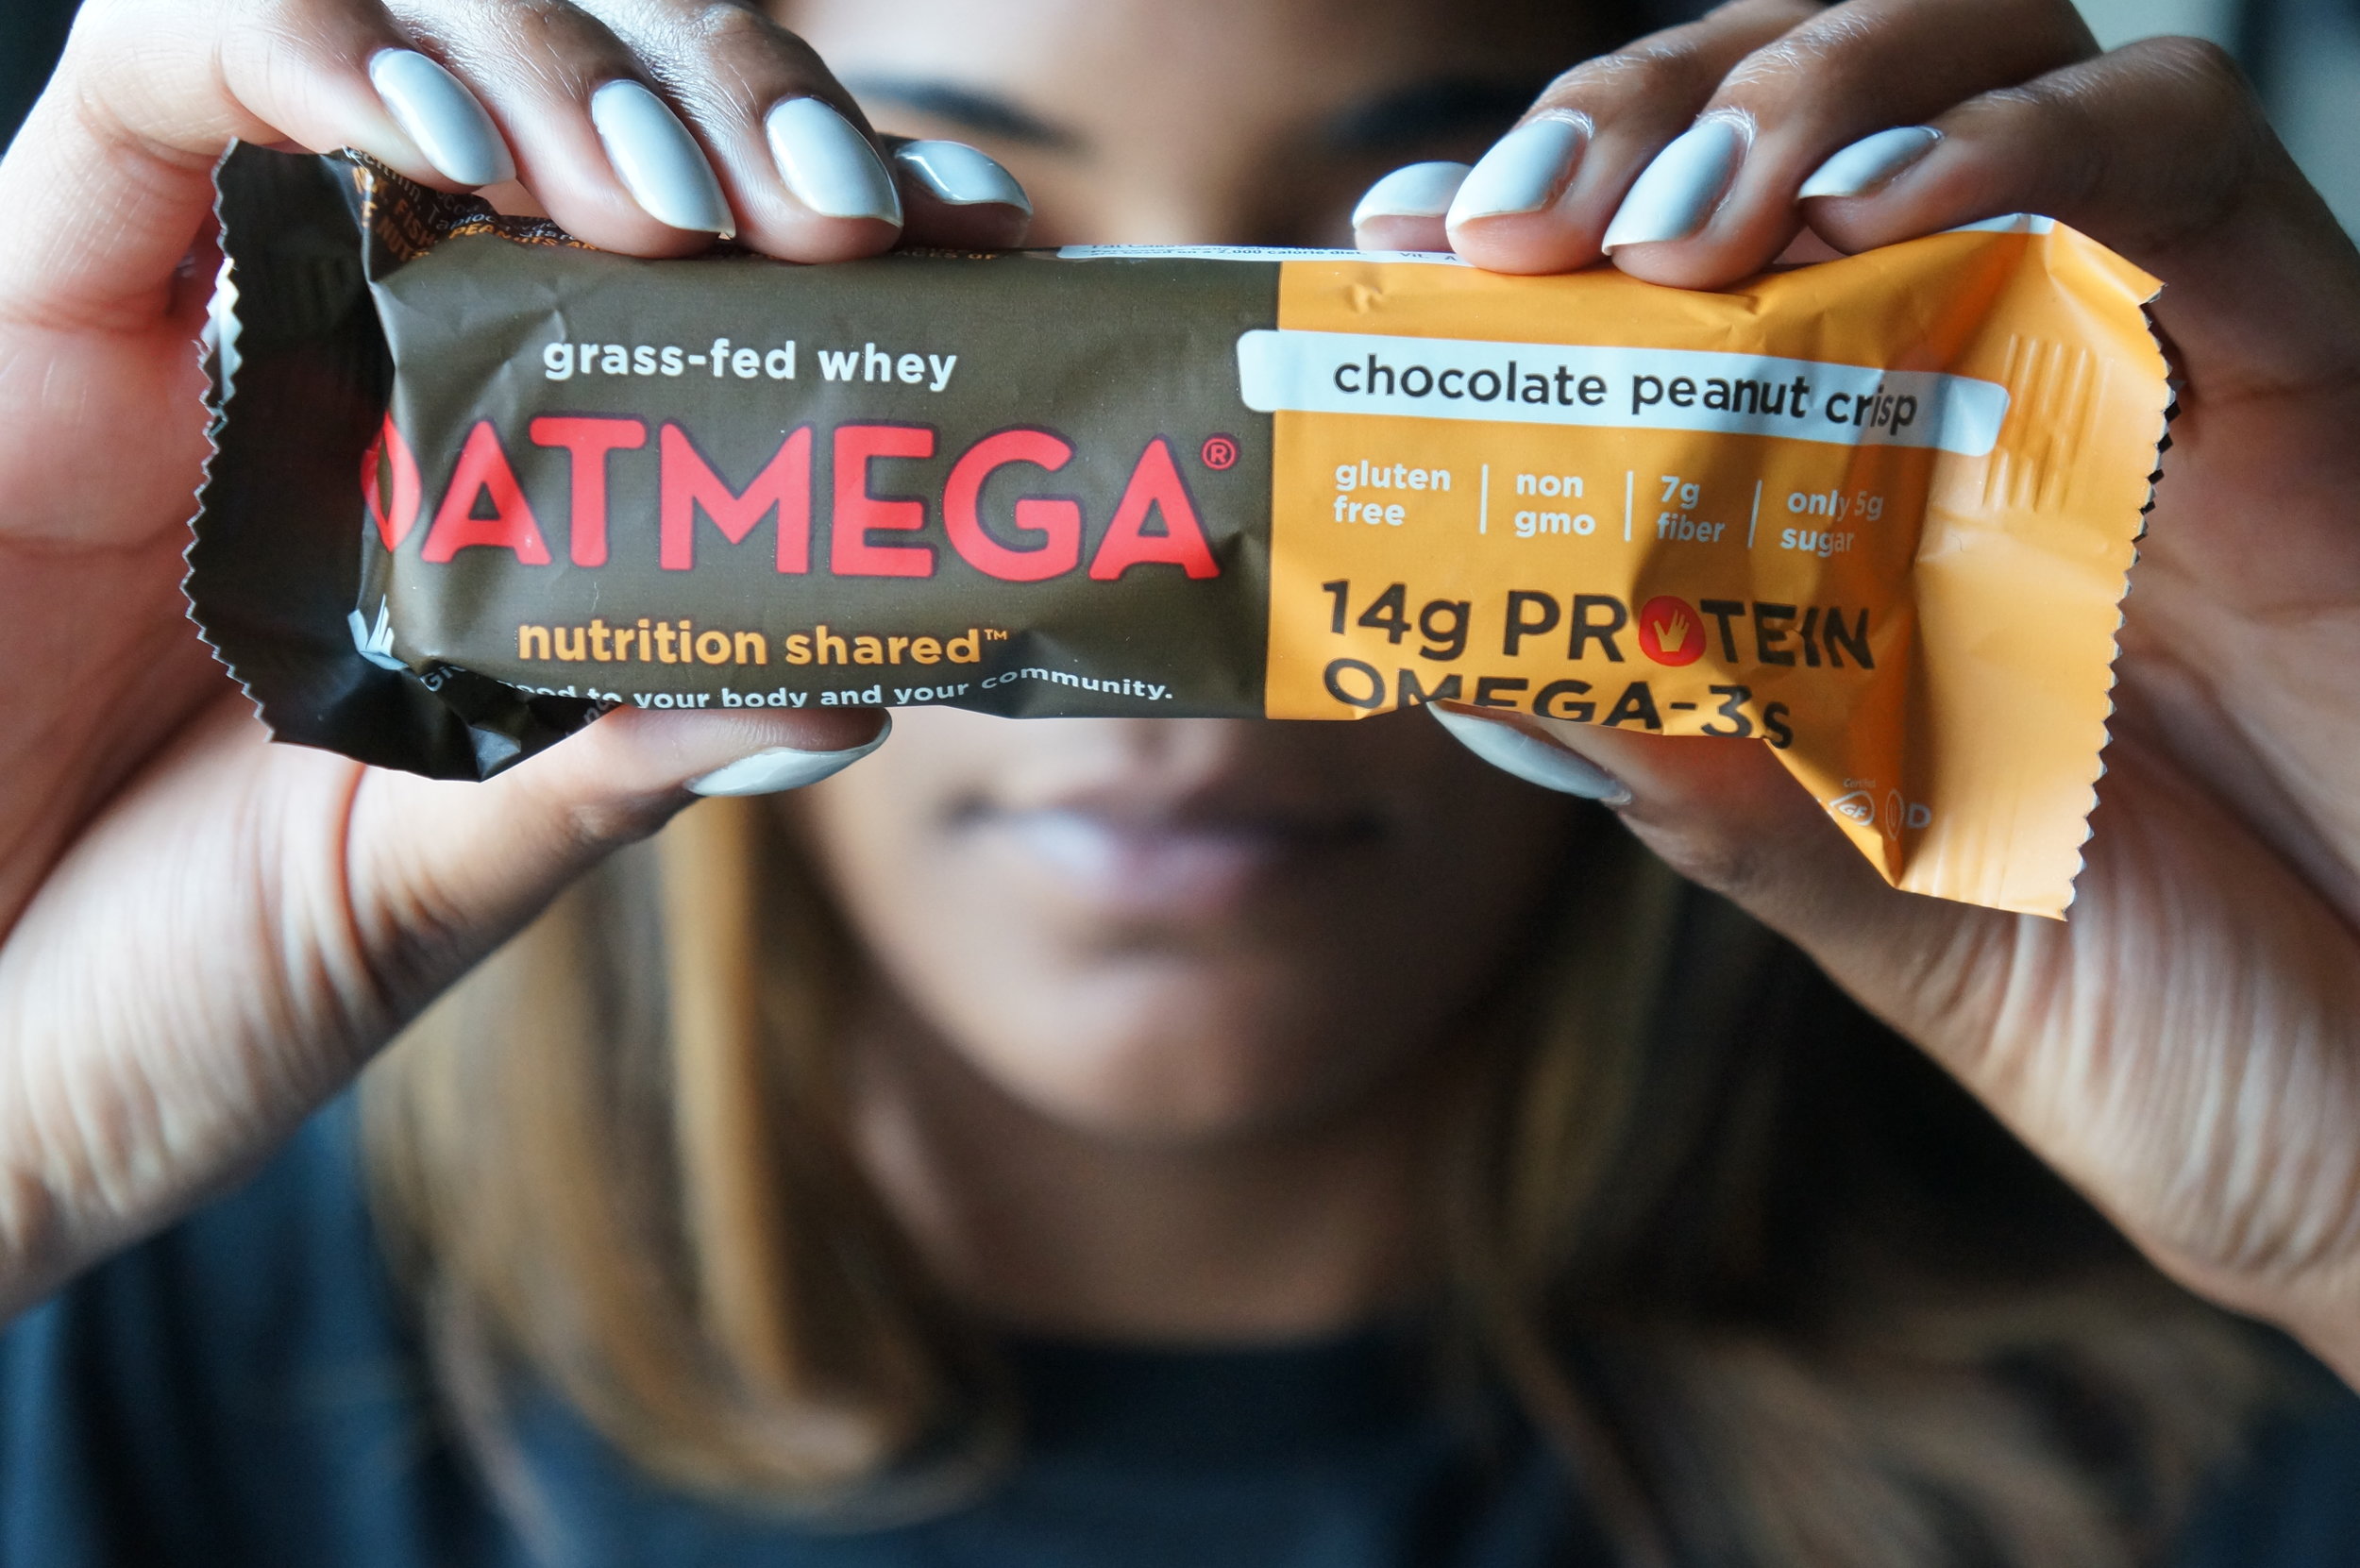
Decide what exactly you will be using the bar for. Some people are looking for a meal replacement bar, while others are looking for the perfect pre-workout snack. Either way, pay close attention to what the bar is telling you about its purpose and and then take a look at the nutritional facts to make sure it can do exactly what it "guarantees." Key point, anything in excess has the ability to do more harm than good. In other words, instead of snacking on protein bars all day to cut carbs have one to pair with your workout and keep some vegetable packs on hand for the rest of the day!
Can you get more bang for your bar?
If you know you are the type of person that has a hard time incorporating healthy fats, vegetables, or even fruits into your daily food regimen; look for bars that can help fulfill some of these categories for you. Yes, "whole foods" always come first... but you also know yourself. Go for the next best thing and grab a bar that might sneak in some leafy greens or omega-3s! Happy Snacking!
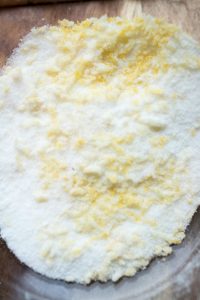
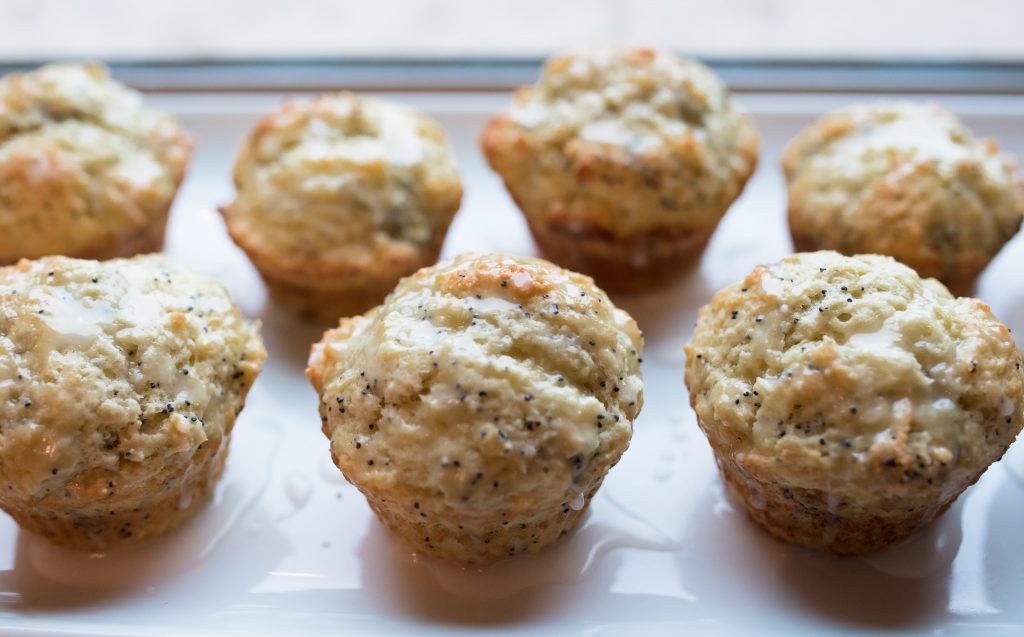
Lemon Poppy Seed Muffins

I don’t bake too often anymore. There is nothing worse than delicious little baked goods sitting around tempting you all day. I can’t help but pop in the kitchen and snag a muffin/cookie/ slice of cake every chance I get. These muffins were worth the temptation though. They are the perfect morning treat. I love to wake up to sunshine flooding into my kitchen and these bright, kind of tart, not-too- sweet muffins sitting in a basket on my counter. PS: The basket of muffins help distract people from the dishes in the sink!
Ingredients:
1 1/2 C Flour
2 tsp baking powder
1/4 tsp baking soda
1/2 tsp salt
2 tbsp poppy seeds
8 tbsp of unsalted butter, melted
1 C sugar
2 eggs
2/3 C plain greek yogurt ( 1 single serve container)
1 tsp vanilla extract
the zest and juice from 1 lemon
For the Glaze
3 tbsp of lemon juice
1 C of powdered sugar
Directions:
- Preheat oven to 400 degrees. Line the muffin pan (I used these silicone liners from Amazon—http://amzn.to/1OOfs9y) or coat with nonstick baking spray.
- In a small bowl, combine sugar and lemon zest. Combine until sugar is slightly wet and fragrant.
- Whisk in all the dry ingredients except for the poppy seeds.
- In a separate bowl, combine the greek yogurt, eggs, vanilla, lemon juice and melted butter.
- Add the wet ingredients to the dry and mix gently until combined. Stir in the poppy seeds.
- Divide batter evenly among 12 muffin cups.
- Bake for 16- 20 minutes. Transfer muffins to cooling rack before adding glaze.
- TO MAKE GLAZE: place powdered sugar in a bowl. Add lemon juice until it’s a consistency you like. I prefer a thin glaze that drips off the spoon.
TIPS:
The instructions are a little involved but don’t look for shortcuts; they’re worth the time.
I have tried several lemon poppy seed muffin recipes and I find that the less mixing and whipping of the ingredients the better.
Add some blueberries for a nice twist!
5 Tips to Simplify Dinner

As an NFL wife, student, business owner and human google search engine for all of my friends and family on things nutrition, my plate is always full. I don't doubt for one second that you can relate when I say we women will often times live in complexity to simplify the lives of others! And really we don't mind because we are naturals at it and usually bask in the refreshing feeling of having checked off everything on our to-do list for the day. But even though we are the masters of multitasking and seem to always have the right answers to combat any uncertainty, why is it so hard to answer the question "what will we have for dinner?"

If you are the cook in your household then you know that the main answer to this questions is quite frank: because dinner is never as simple as it sounds. It requires creating a meal that satisfies tastebuds, keeps complaints to a minimum, avoids unrequested repetition, meets nutritional needs and contains just enough food so that you don't have to remind yourself to be a joyful giver as you stingily give away your personal portions to a husband that needs over 3000 calories. Honestly, its like Burger King should have to pay us every time we allow someone to "have it their way" when it comes to dinner time. Constantly trying to strive to make this process easier for myself personally, I have put together a (almost) perfected list of how to make dinner easier so that we too can enjoy some simplicity every now and then :)
- Draw inspiration: Collect meal ideas from family members, in-laws, friends and even the WAGS Redefined site as inspiration for fresh and creative meals to avoid boredom. Also, checking out magazines while in line at the grocery store will always encourage a new bright idea that you and your family might enjoy!
- Make a menu: Creating a menu for the upcoming week takes the guessing out of figuring out daily meals and it gives everyone a chance to put in their personal request for particular menu changes. Tell 'em speak now or forever hold their peace!
- Always prepare EXTRA: Yes, YOU may be full after one plate but our guys tend to see that as just an appetizer. Making too much is always better than not making enough. Plus you can freeze extras or throw some leftovers in an awesome stir-fry for lunch the next day! Get creative...
- Prep for the week: As a co-owner of a meal preparation company I know how much easier it is for families with busy lives to just open the refrigerator and grab a pre-portioned prepared meal. Turn into your own meal prep chef by preparing your meals for the week on the weekend. This saves time and is especially useful if there are just two of you like my husband and I.
- Count servings, not calories: If your guy's team has a dietitian on staff, reach out to him or her to find out how many servings of macronutrients (carbohydrates, protein, and fat) each of you need per meal. Use this as a guide when preparing your plates to give yourself some peace of mind that you are both eating exactly what you need nutritionally!
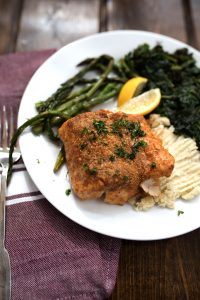
Lemon Parmesan Crusted Cod; a Whole Foods "score!"
I have to be weary when I send my husband to the grocery store alone. Not because he forgets things or buys junk food; he is very likely to pick up an item that sounds good and just propose I whip it up real quick… Well a recent trip to Whole Foods returned a couple gorgeous pieces of Atlantic Cod. I don’t cook a ton of fish, but when I do…
For an easy and healthy lunch, I whipped up lemon parmesan crusted Atlantic Cod, leftover grilled asparagus, cauliflower mash, and some sautéed spinach. It got his seal of approval and took less than 30 minutes to prepare.
The fish is light, fresh, and is perfect for hot summer days or if you're just trying to lean up in time for the summer!
 Ingredients
2 pieces of meaty white fish
1/2 C of grated parmesan cheese
1 teaspoon of lemon zest
1/4 tsp pepper
fresh parsley, minced
olive oil
Instructions
- Preheat the oven to 350 degrees. Line a baking sheet with nonstick foil.
- Mix grated parmesan cheese, lemon zest, and pepper in a shallow dish.
- lightly drizzle the fish with olive oil. Just enough so that the parmesan mixture adheres.
- Coat each side of the fish with mixture.
- Bake for 12- 15 minutes. Fish will be white and flaky.
- Top with chopped parsley and a squeeze of fresh lemon.
- enjoy!
TIPS
I always purchase either whole pieces of parmesan cheese or the shredded variety. To get grated parmesan cheese, all you have to do it pulse it in a blender.
For the cauliflower mash, boil a head of cauliflower till fork tender. Drain. Add 1 tablespoon of butter. Use an immersion blender, or a food processor to pulse till smooth. If too chunky, add more butter or a little milk. Season just like you would mashed potatoes!
The crust for the fish is something I have also done on a chicken breast. To lessen the amount of parmesan cheese, add a 1/4 c of whole wheat panko crumbs and bake for longer.
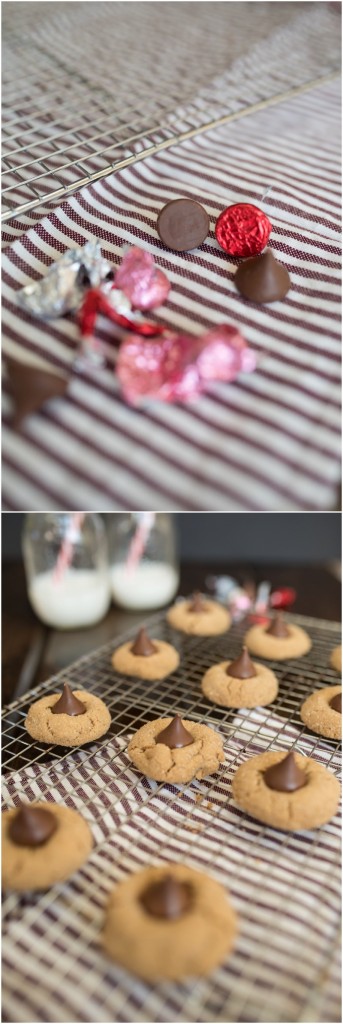
Delicious Cookie Butter Cookies Recipe
Are you familiar with Trader Joe’s Cookie Butter? If not, RUN (don't walk) to your nearest Trader Joe’s and get at least three jars. It’s good on an apple, a stalk of celery, a spoon…You get it? Another plus: It’s a nut free spread. It doesn't offer the protein of peanut butter but IS less calories and VERY delicious. 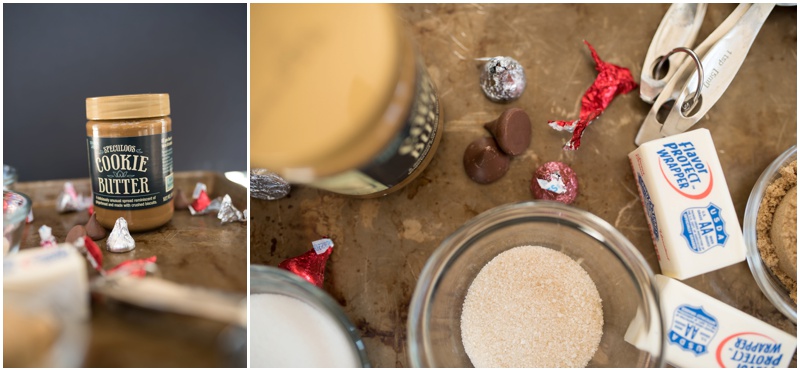 Well, this recipe adds the goodness of Cookie Butter to the traditional blossom cookies you used to eat as a kid. I made them for the Super Bowl and again for my honey on Valentine’s Day. I see these making a monthly appearance in my kitchen.
They are delicious cookie butter filled cookies, topped with a milk chocolate Hershey's Kiss immediately upon removal from the oven. 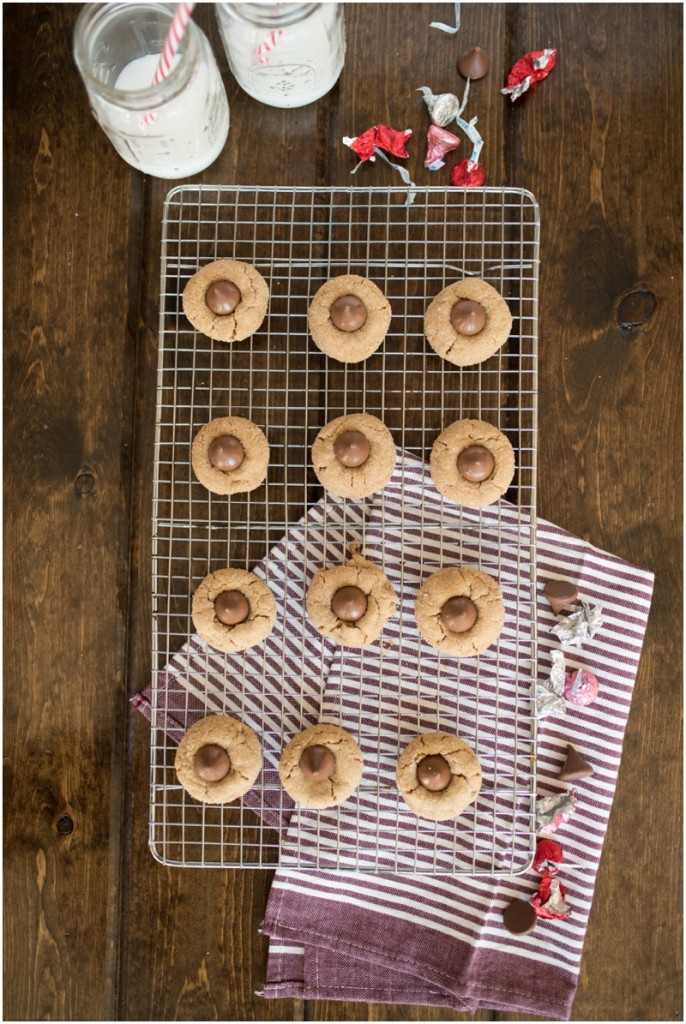

Ingredients
1 C Cookie Butter
1/2 lb of unsalted butter (1 stick)
1/3 cup brown sugar
1/3 cup sugar
1 large egg
1 tsp. vanilla extract
2 cups all-purpose (or white whole-wheat) flour
1 tsp. baking soda
1/2 tsp. salt
24 Hershey Kisses
About 1/2 C sugar, for rolling the cookie dough in
Instructions
- Preheat oven to 350 degrees.
- Cream together the cookie butter, butter, sugar, and brown sugar
- Add in the egg and vanilla extract
- Stir in the flour, baking soda, and salt.
- Use a cookie scoop to form dough balls. Roll each cookie dough ball in the sugar.
- Place about 2 inches apart on the cookie sheet.
- Bake for 12 minutes until slightly cracking on top. Remove from oven and immediately place a Hershey’s Kiss in the middle.
Pan-Seared Chicken Breast for A Date Night at Home
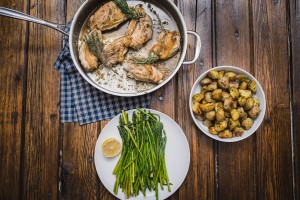
Now that the holidays have passed, all I want is simple, healthy, and delicious food. I will admit, I ate one too many homemade cinnamon rolls and more pie than I should have. Now that all our company has left, Jeff and I were planning a "Stay at Home Date Night." I wanted the meal to look special but not take all day to prepare.
Well nothing goes better with a glass of wine and Netflix, than Pan-Seared Chicken Breast, Herbed Potatoes, and Sautéed Asparagus.
The chicken is moist and flavorful served alongside a smooth white wine pan sauce. You get a ton of flavor out of one skillet.
Ingredients
- 2 Pounds of bone-in chicken breast with the skin (I used boneless with the skin because that’s all the store had but bone-in is preferred)
- 1/2 C chicken broth
- 1/2 C dry white wine
- 1 shallot, minced
- 2 cloves of garlic, minced
- 1 tbsp of butter
- 1 tbsp of olive oil
- salt+pepper
- 1 sprig of fresh rosemary
- 1 sprig of fresh thyme
- 1/2 lemon, chopped parsley, rosemary, and thyme for garnishing at the end*
*optional
Instructions

- Preheat oven to 400 degrees.
- Liberally season the chicken breast with salt + pepper
- Heat a large oven-safe skillet on medium high heat. Once warmed, add 1 tbsp of butter and 1 tbsp of olive oil.
- Add chicken to the pan skin side down. Let the skin brown and crisp up (approx. 4 minutes). Try not to move the chicken too much; this ensures a nice, crispy skin.
- Flip the chicken, add 1 sprig of rosemary and 1 sprig of thyme, and slide entire pan into oven. Bake for 10- 15 minutes. Depending on the size of the chicken breast, this might be too much or too little time. Check for doneness every so often.
- When chicken is cooked throughout, remove chicken from pan and let it rest on a plate. Remove herbs.
- To make the sauce, place pan back on the stove and add the shallot and garlic.
- Once fragrant, use the chicken broth and white wine to deglaze the pan. Let simmer for 5 minutes. Season with more salt and pepper, if necessary.
- You can place the chicken back in the pan or just spoon the sauce over top when serving!
- Top with a fresh squeeze of lemon juice and enjoy.
Tips

herbed potatoes
If you are trying to be more health conscious, you can lose the butter and use all olive oil, just don't let it burn!
If you don’t have any white wine on hand, just double the amount of chicken broth.
I strongly encourage you to taste the sauce several times as you prepare it. Maybe it needs more salt or pepper. Maybe it's missing some herbs. Add dried rosemary and thyme if necessary.
A recipe like this is hard to provide exact measurements and cooking times for. It needs to be prepared thoughtfully as to not overcook the chicken or end up with a bland pan sauce.
You will be able to find the recipe for the herbed potatoes over on my blog, The New Mrs.Allen. They really complete the meal and require very little effort.
Let me know how your date night goes!
Marissa A
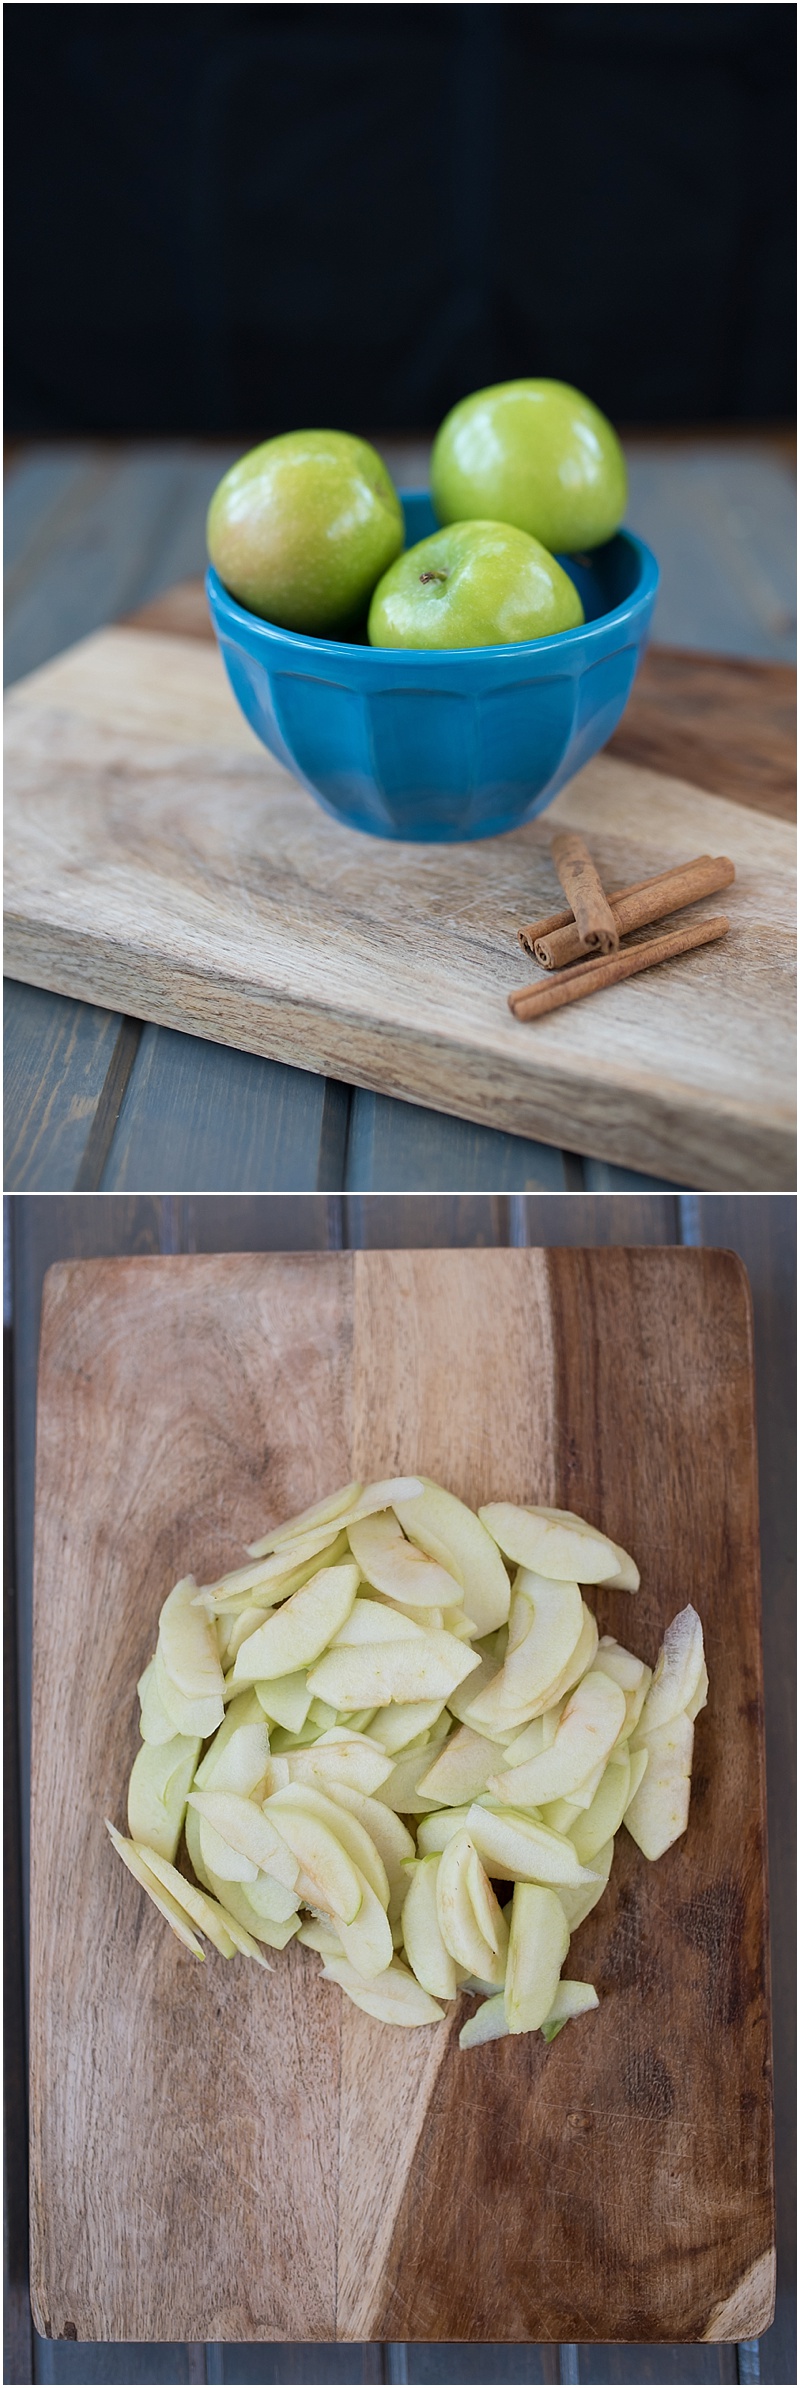
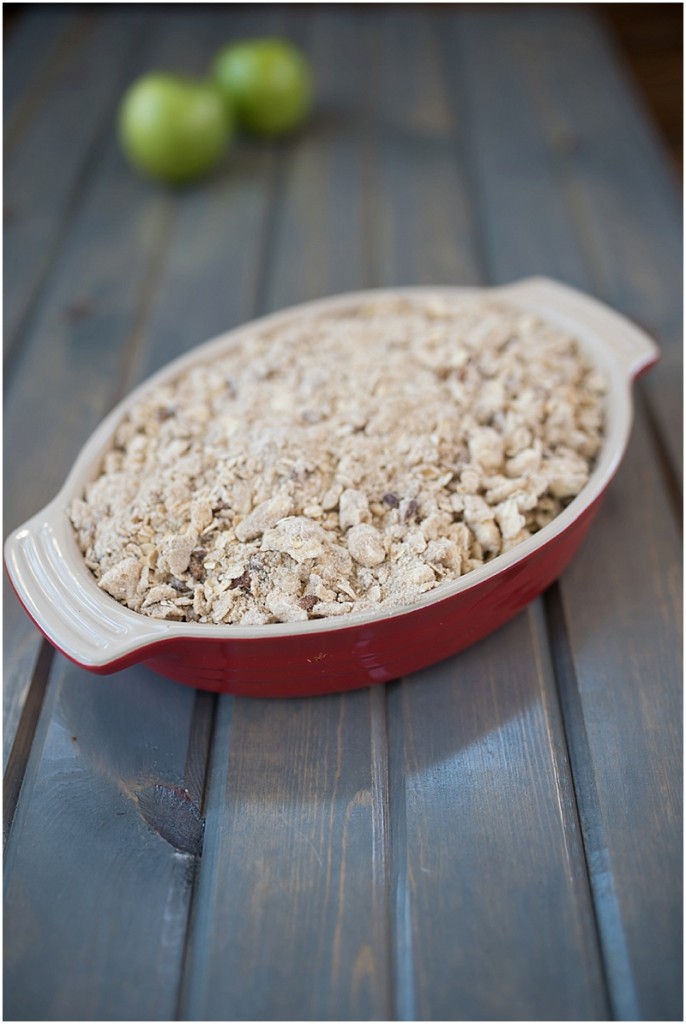
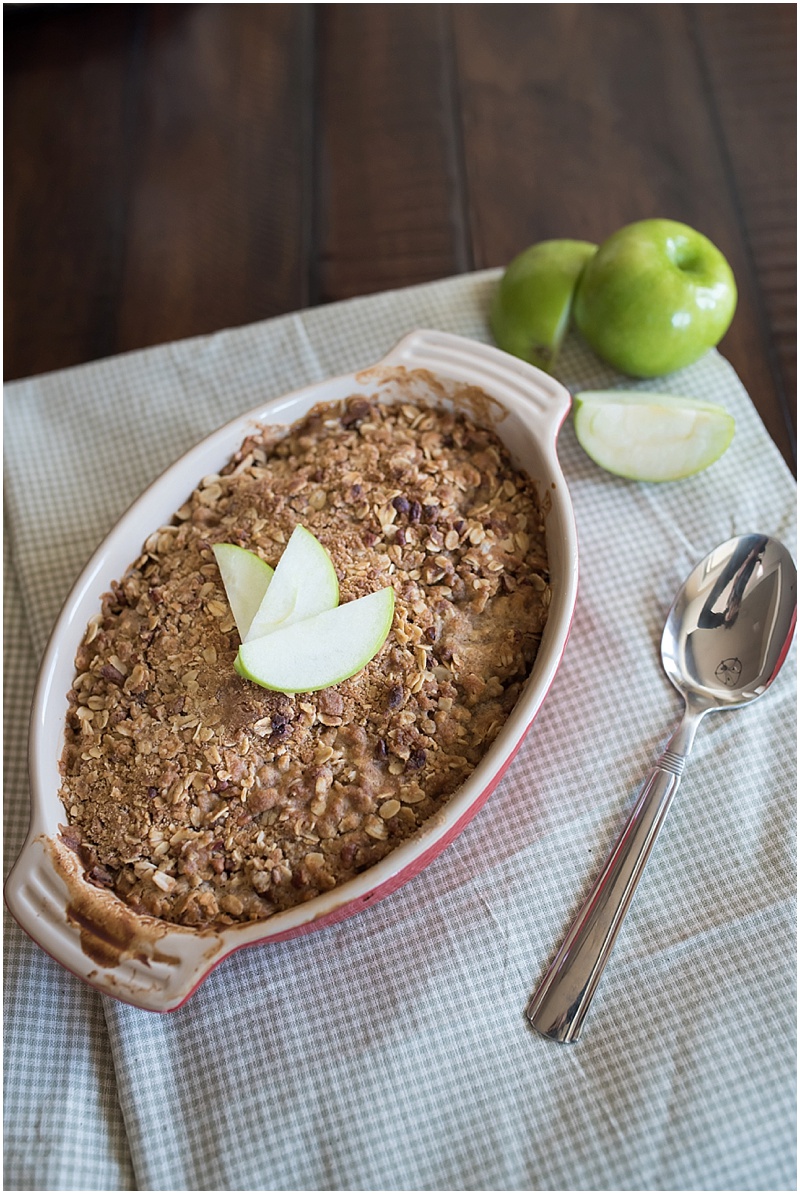
Holiday Recipe: Easy Apple Crisp
2015-11-25_0003
With all these holiday parties coming up, you are going to need a go-to recipe. Might I suggest an apple crisp? It calls for tart Granny Smith apples, old fashioned oatmeal, and fresh cinnamon. This recipe is a crowd pleaser. Funny story: I made the crisp, put it in the oven and was anxious to take it out. I let it cool, drizzled on the caramel, and opened my freezer looking for the ice cream and I didn't have any! I was immediately disappointed but then I remembered that lone cup of vanilla greek yogurt in the refrigerator. I was in a desperate state and took a huge spoonful and plopped it on top of the crisp. Would you believe me if I told you it was DELICIOUS? It added the right amount of creaminess and wasn’t too sweet. If you want to save a few calories, give it a try. I love kitchen accidents turned successes.
Ingredients
Crumb Topping
- 1/2 C Flour
- 1/2 C Brown Sugar
- 1/2 C old fashioned oats
- 1/2 tsp baking powder
- 1/2 tsp of cinnamon
- 1/4 tsp of salt
- 1/3 C of butter (cold)
- 1/4 c pecans, chopped
Apple Filling
- 3 Granny Smith apples, peeled and sliced thin
- 3 tbsp butter, melted
- 3 tbsp of flour
- 3 tbsp milk
- vanilla extract
- 1/4 C of brown sugar
- 1/2 tsp of cinnamon
Caramel for drizzling on top (optional)
Instructions
- Preheat the oven to 375 degrees.
- In a bowl, combine all the ingredients for the crumb topping. “Cut in the butter” (Here is a tutorial if you are unsure how to do it) and mix until it resembles crumbs.
- For the filling, stir the melted butter, milk, vanilla extract, brown sugar, and cinnamon together. Add the apples. For the last step, stir in the flour.
- In a buttered baking dish, add the apple mixture followed by the crumb topping.
- Bake for 30 minutes or until golden brown. Let cool for about 10 minutes.

2015-11-25_0005
Enjoy with greek yogurt or ice cream. Don't forget the caramel drizzle!
Marissa A